Simple FastApi App Example on Open Telekom Cloud
This is a simple example on how to create a FastApi application and deploy it as FunctionGraph HTTP function on Open Telekom Cloud.
Requirements
Unix-like environment (Linux or WSL on Windows)
Python 3.10
Python virtual environment
Open Telekom Cloud account
Create FastAPI App
mkdir otc-fastapi-app

cd otc-fastapi-app

python3 -m venv .venv

source .venv/bin/activate

# Install FastAPI and Uvicorn
python3 -m pip install fastapi[standard] uvicorn

mkdir src
Add app.py file in src directory
from fastapi import FastAPI

app = FastAPI()

@app.get("/")
async def read_root():
    return {"message": "Hello World of FastAPI on OTC!"}

if __name__ == "__main__":
    import uvicorn

    # On OpenTelekomCloud FunctionGraph port must be 8000
    uvicorn.run("app:app", port=8000, log_level="debug", reload=True, host="localhost")
Run FastAPI app.py locally
cd src

python3 app.py
Open browser with http://localhost:8000/docs
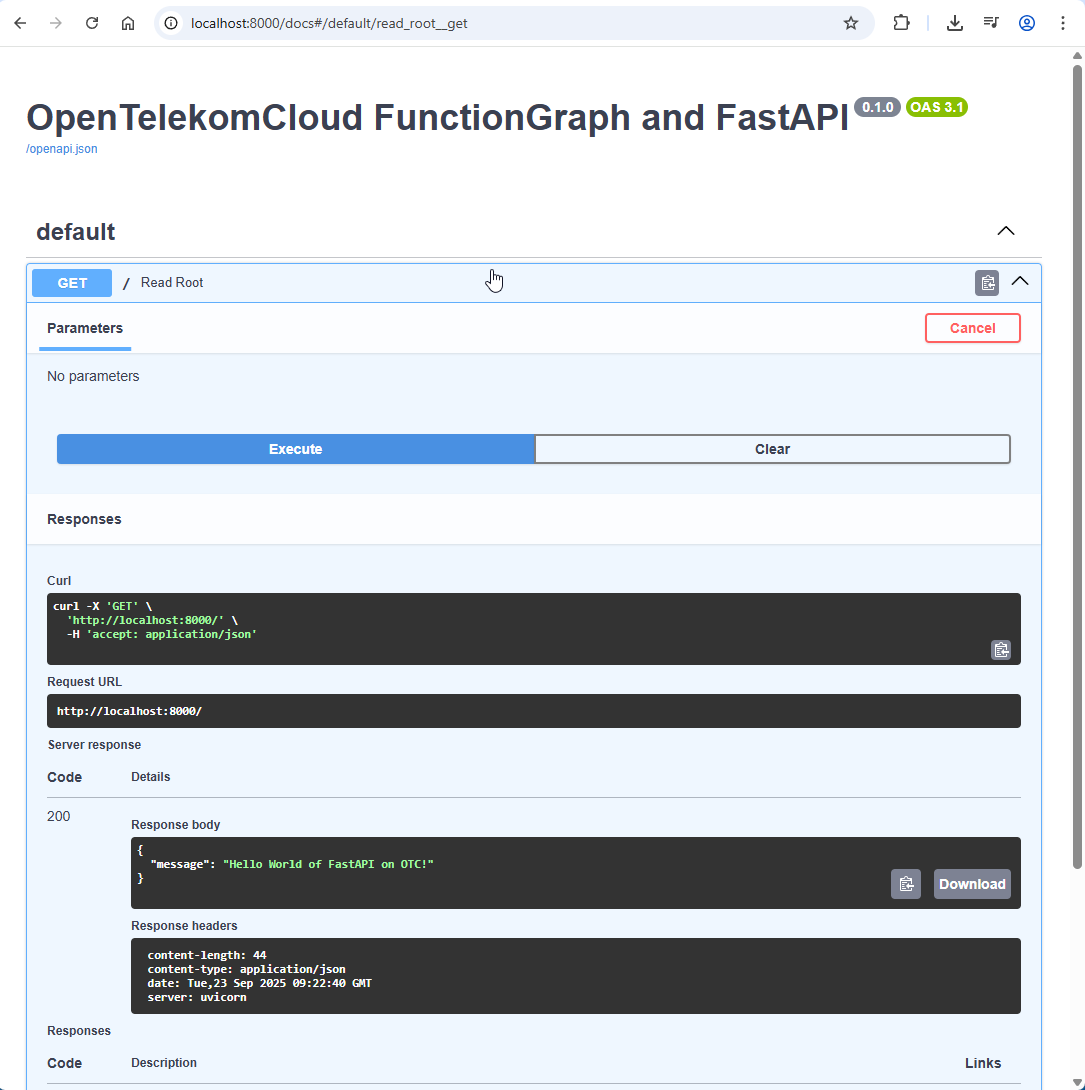
You can test your endpoint by clicking on the GET / Read Root route and then clicking execute.
Deploy FastAPI app as FunctionGraph HTTP function
Create deployment package
Create bootstrap file
The bootstrap file is the startup file of the HTTP function. The HTTP function can only read bootstrap as the startup file name from the root of the deployment package.
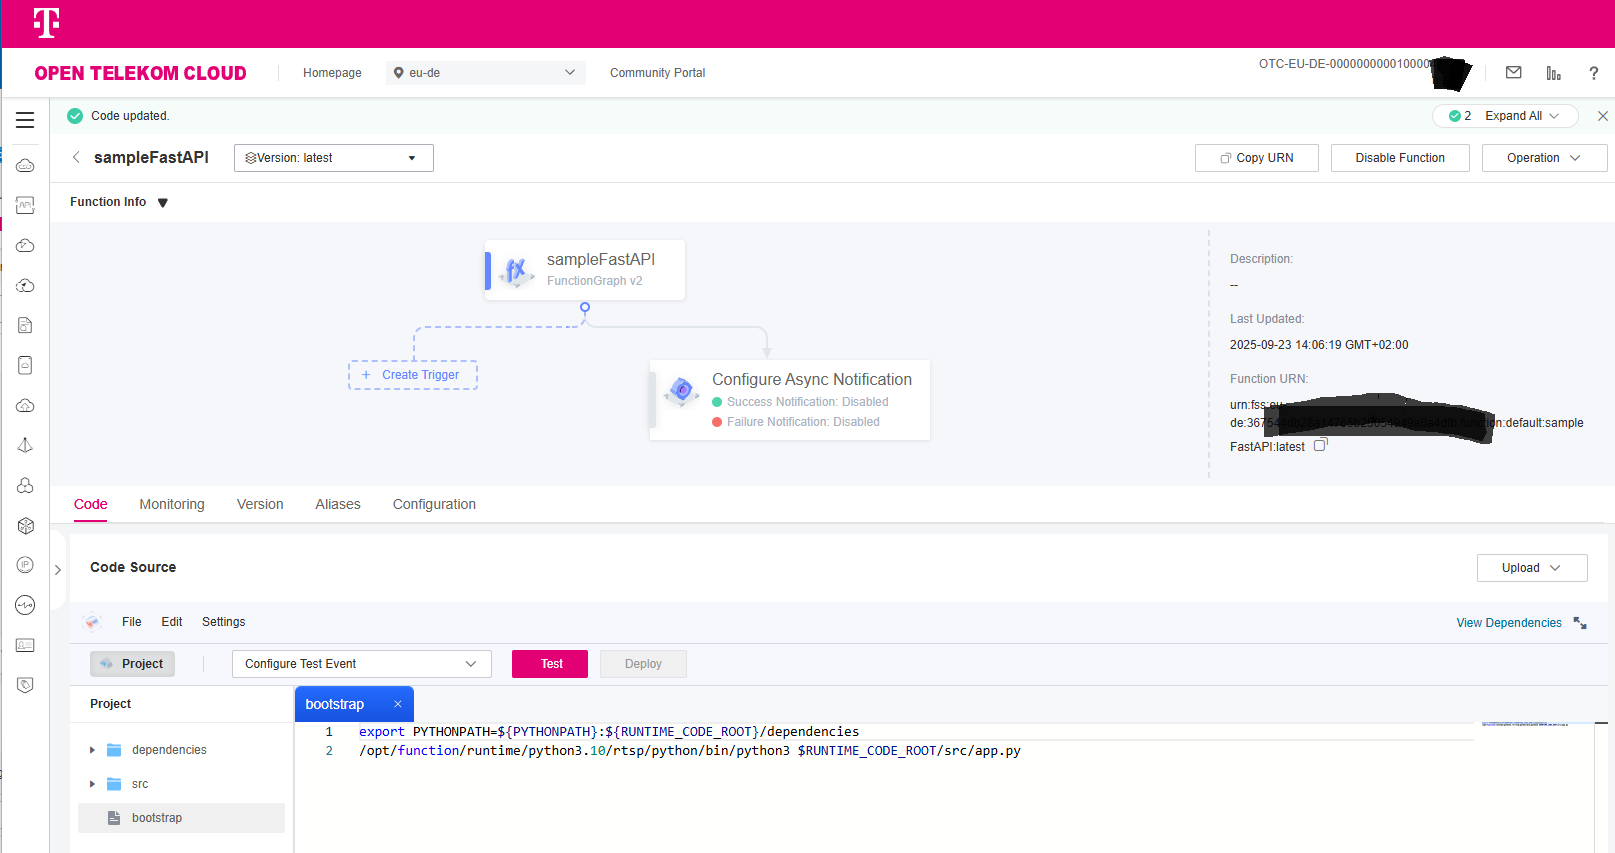
Additional to the startup of the FastAPI app, the bootstrap file must set the PYTHONPATH to include the dependencies folder.
export PYTHONPATH=${PYTHONPATH}:${RUNTIME_CODE_ROOT}/dependencies
/opt/function/runtime/python3.10/rtsp/python/bin/python3 $RUNTIME_CODE_ROOT/src/app.py
Create deployment zip file
The structure of the zip file must be like:
  .
  ├── bootstrap
  ├── dependencies
  │   ├── <all dependencies installed in venv>
  └── src
      └── app.py
The following commands create a zip file containing the dependencies folder, the src folder and the bootstrap file:
  rm -r -f target
  mkdir -p target/zip_content/dependencies
  mkdir -p target/zip_content/src
  cp -R .venv/lib/python3.10/site-packages/* target/zip_content/dependencies
  cp -R src target/zip_content
  cp -R bootstrap target/zip_content

  (export TARGET=${PWD}/target && cd target/zip_content && zip -r ${TARGET}/code.zip . --exclude \*__pycache__\*)
Create FunctionGraph HTTP function on Open Telekom Cloud
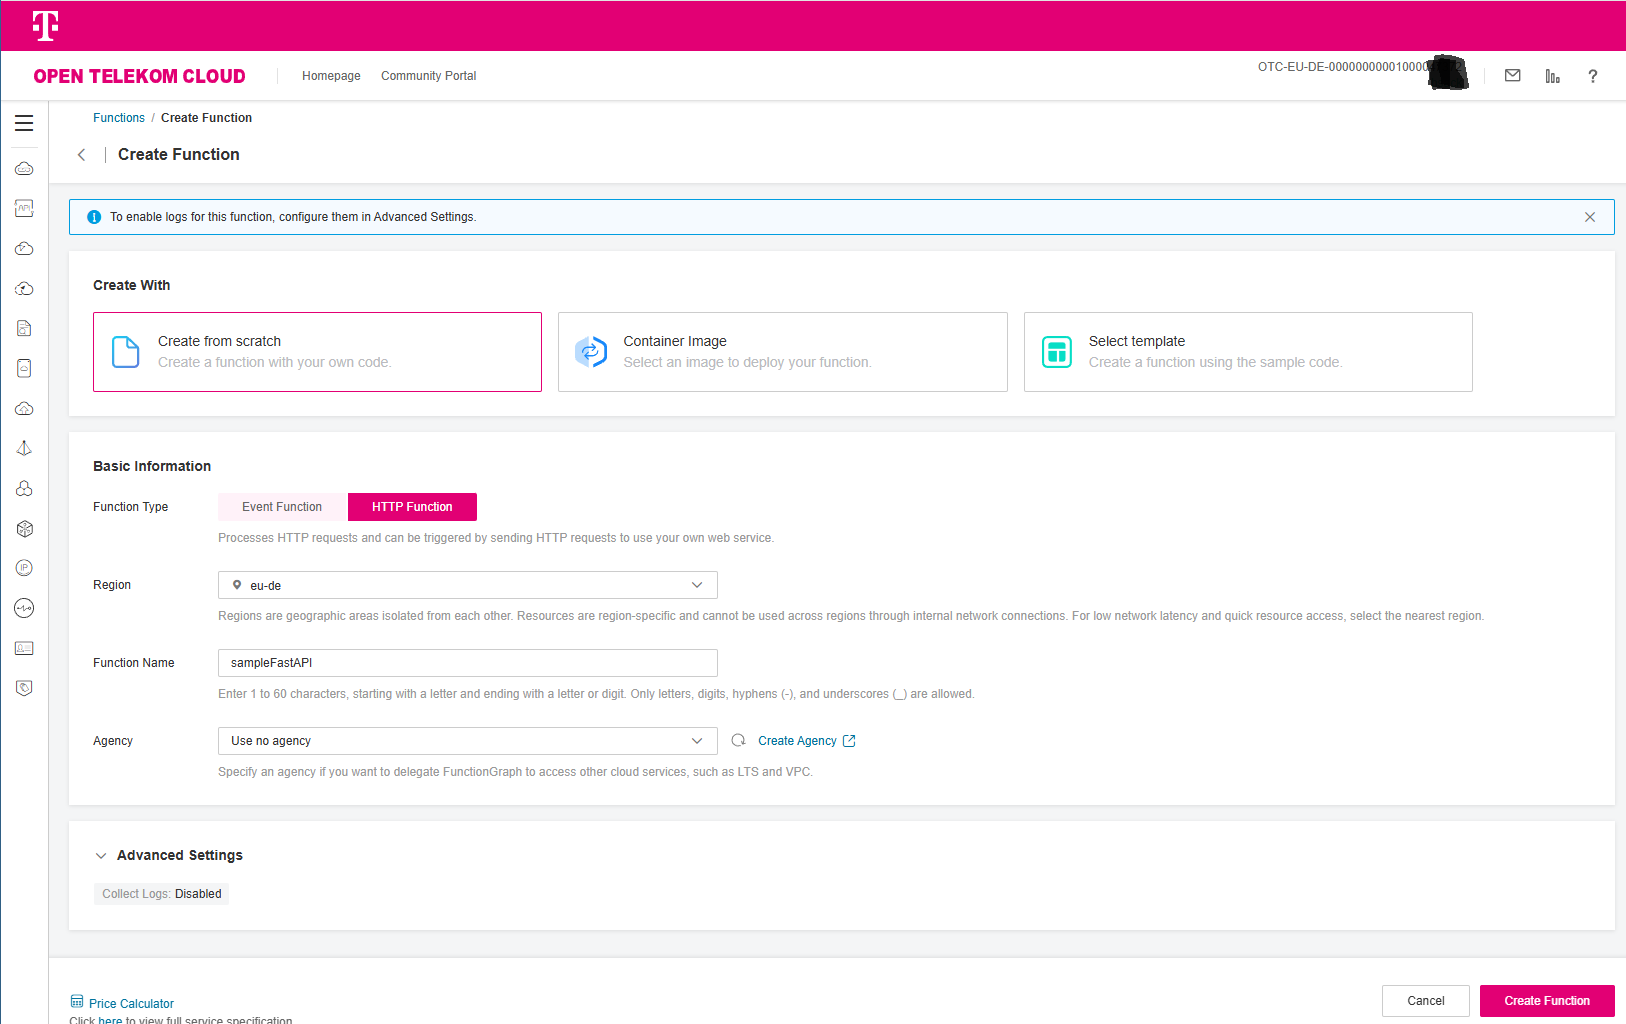
Login to the FunctionGraph console and click on Create Function.

Select Create from scratch and as function type select HTTP function, choose a name for your function (e.g. simpleFastApi) and click on Create Function:
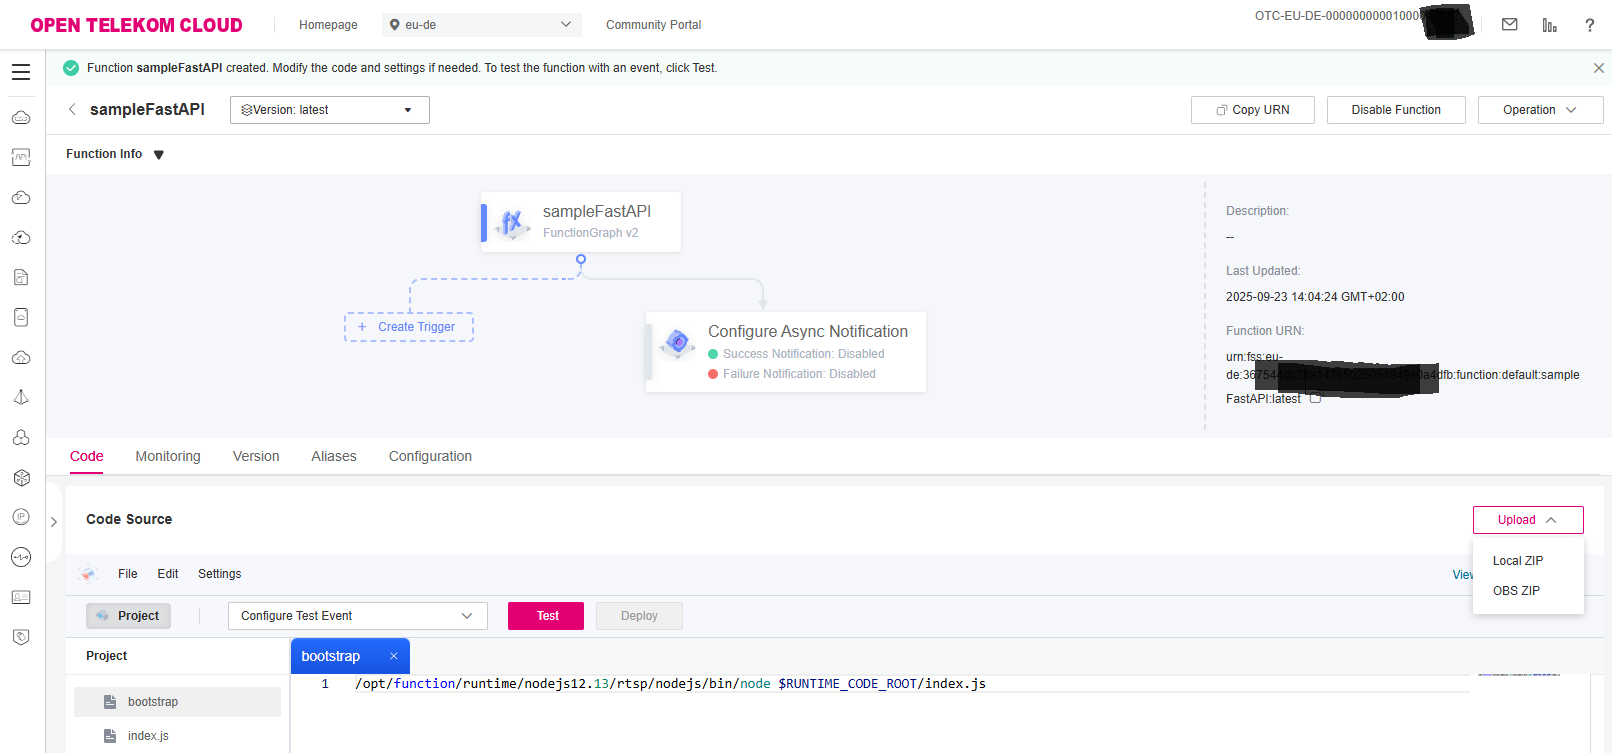
Now upload the zip file created before
(target/code.zip) using the Upload - Local ZIP button:
To test the function, create a test event using the Test button:
Choose API Gateway (Dedicated) from the Event Template List.
You can use the sample test event below (see next code block). Choose a name for the test event (e.g. root) and click on OK.
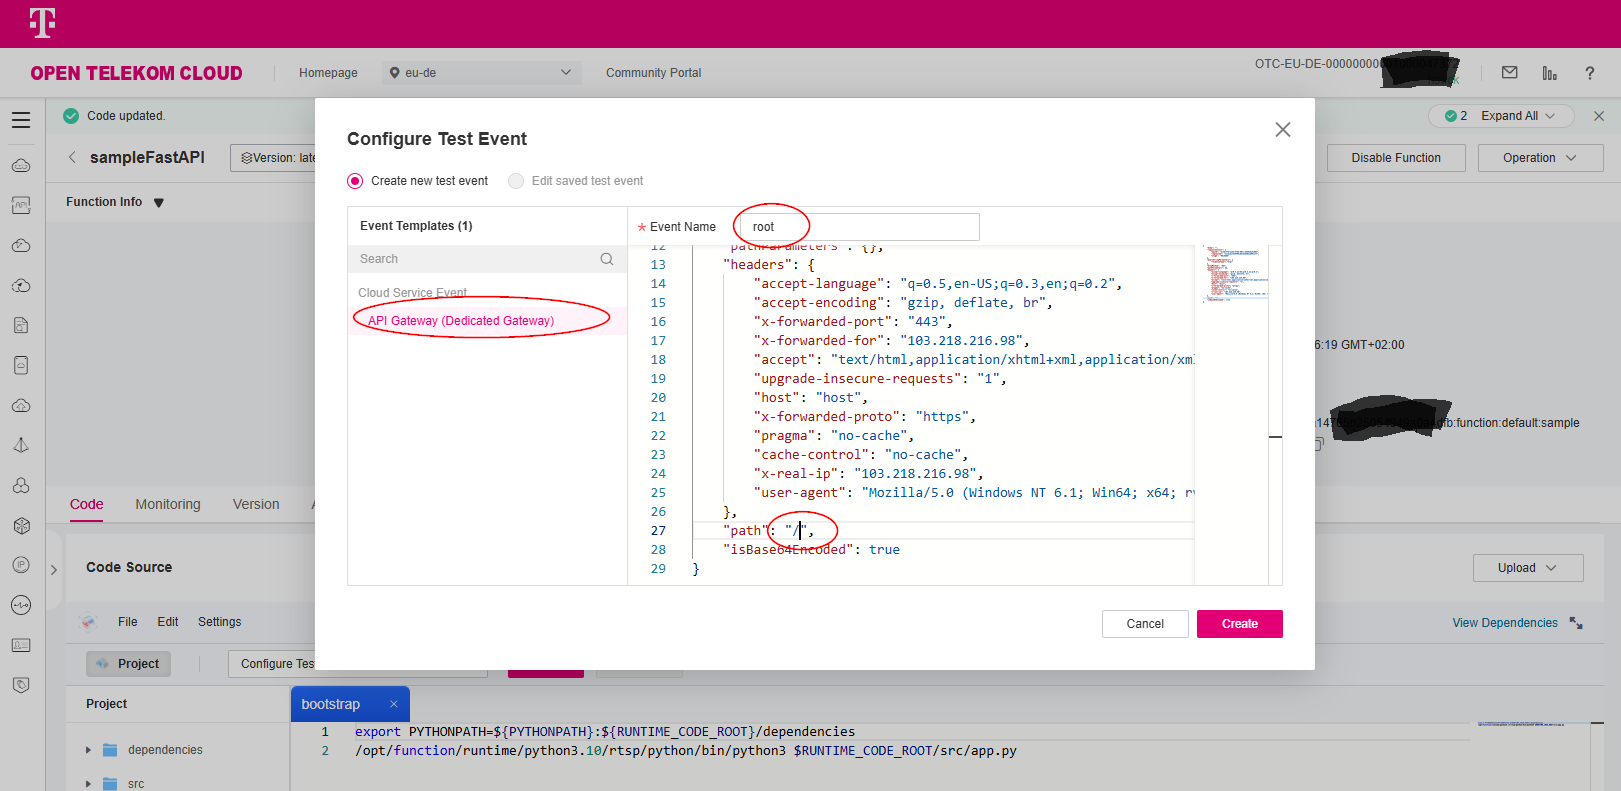
The adaption in the test event is the
"httpMethod"= “GET” (line 11) and"path"= “/” (line 27)
field to match your FastAPI endpoint:
 1  {
 2      "body": "",
 3      "requestContext": {
 4          "apiId": "bc1dcffd-aa35-474d-897c-d53425a4c08e",
 5          "requestId": "11cdcdcf33949dc6d722640a13091c77",
 6          "stage": "RELEASE"
 7      },
 8      "queryStringParameters": {
 9          "responseType": "html"
10      },
11      "httpMethod": "GET",
12      "pathParameters": {},
13      "headers": {
14          "accept-language": "q=0.5,en-US;q=0.3,en;q=0.2",
15          "accept-encoding": "gzip, deflate, br",
16          "x-forwarded-port": "443",
17          "x-forwarded-for": "103.218.216.98",
18          "accept": "text/html,application/xhtml+xml,application/xml;q=0.9,*/*;q=0.8",
19          "upgrade-insecure-requests": "1",
20          "host": "host",
21          "x-forwarded-proto": "https",
22          "pragma": "no-cache",
23          "cache-control": "no-cache",
24          "x-real-ip": "103.218.216.98",
25          "user-agent": "Mozilla/5.0 (Windows NT 6.1; Win64; x64; rv:57.0) Gecko/20100101 Firefox/57.0"
26      },
27      "path": "/",
28      "isBase64Encoded": true
29  }
and click on Create.
Now you can execute the test event using the Test button.
The result of the execution is shown below:
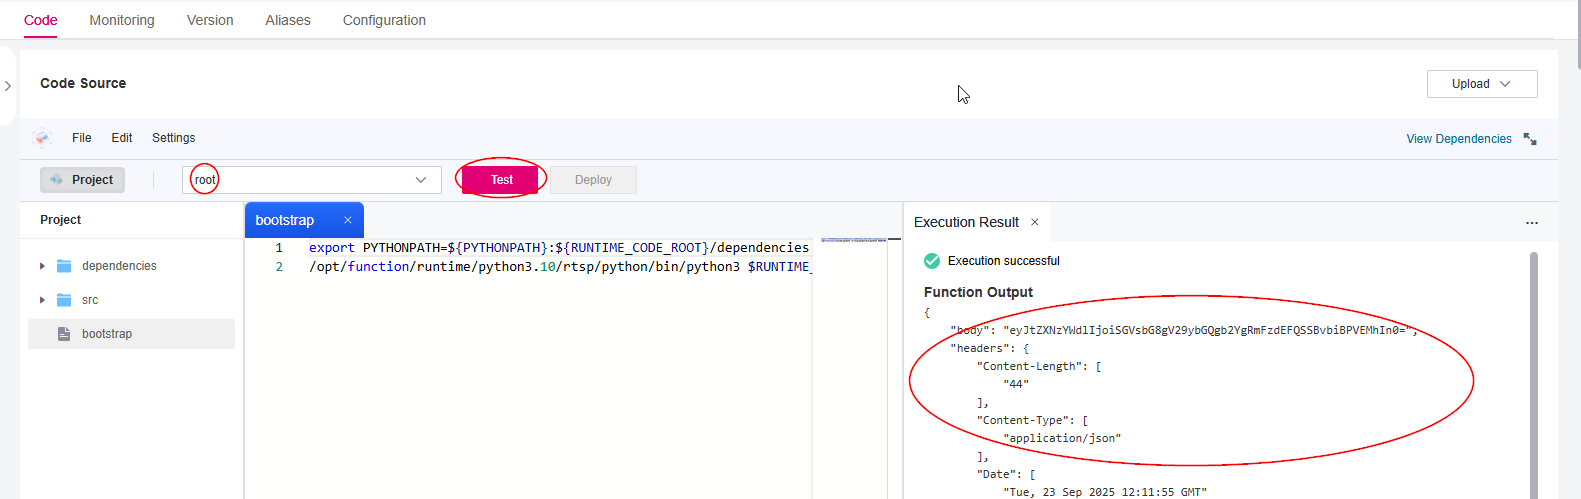
The full execution result is shown below:
  {
      "body": "eyJtZXNzYWdlIjoiSGVsbG8gV29ybGQgb2YgRmFzdEFQSSBvbiBPVEMhIn0=",
      "headers": {
          "Content-Length": [
              "44"
          ],
          "Content-Type": [
              "application/json"
          ],
          "Date": [
              "Tue, 23 Sep 2025 10:59:49 GMT"
          ],
          "Server": [
              "uvicorn"
          ]
      },
      "statusCode": 200,
      "isBase64Encoded": true
  }
The body is base64 encoded, to decode the body use following command:
  echo "eyJtZXNzYWdlIjoiSGVsbG8gV29ybGQgb2YgRmFzdEFQSSBvbiBPVEMhIn0=" | base64 --decode

  # response
  {"message":"Hello World of FastAPI on OTC!"}
Outlook
You can now create an API Gateway trigger together with an API Gateway to call your FunctionGraph HTTP function from outside the Open Telekom Cloud.
For a full example including API Gateway and Terraform, see Sample.